Lock GPS Location
The Lock GPS function aims to assist users in two ways:
- Allow users to refine their position when working in and around buildings or between two properties, where GPS can be affected due to limited clear view of the sky.
- Allow users to refine the GPS position to the subject matter they are taking a photo of instead of their position.
Below are the steps to locking and unlocking your position with corresponding screenshots.
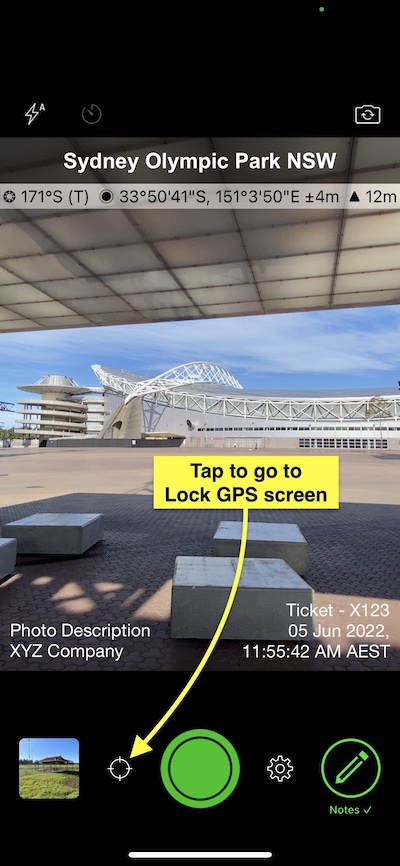
- Tap the current location button in the camera view (just to the left of the shutter button). You can also swipe across the camera to the left-hand side of the camera view.
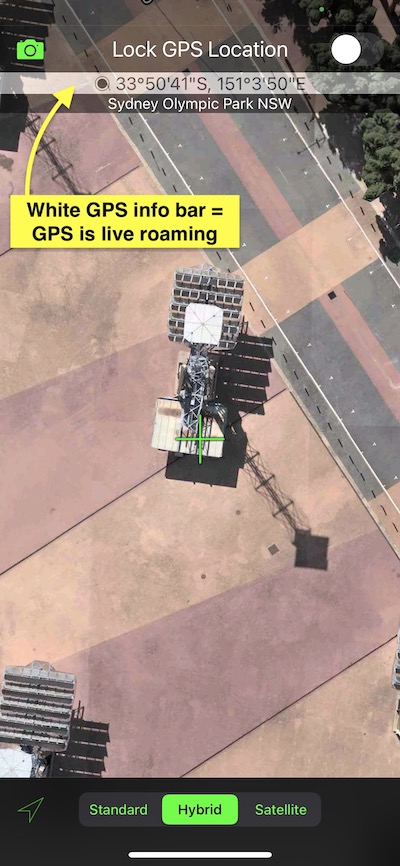
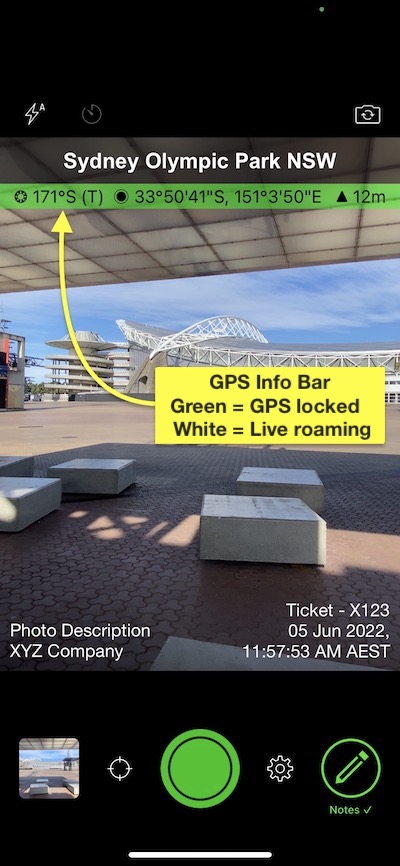
- The Lock GPS Location screen opens with your approximate position on Apple maps, and the GPS info bar is white when in live roaming.
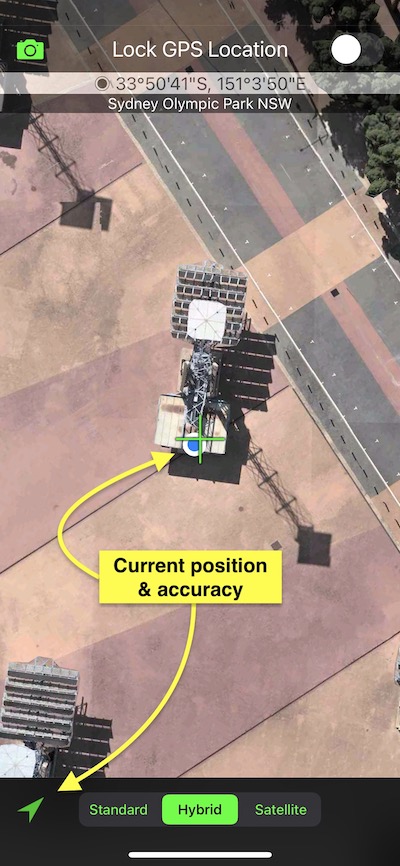
- Tap the locate my current position button on the bottom taskbar on the left (it looks like an arrowhead). When tapped, it fills in green, and you get a shaded blue circle on the map showing your current position and the current accuracy +/- distance.
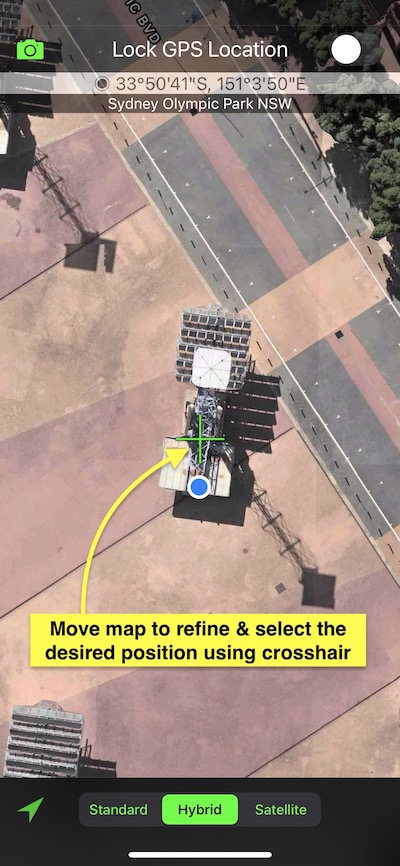
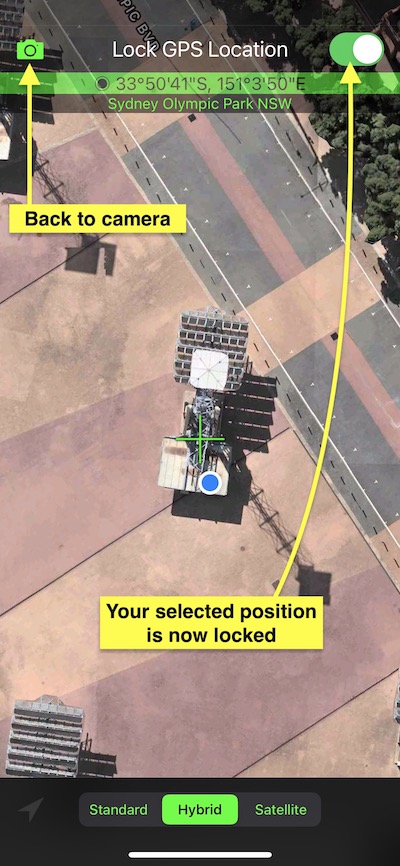
- The crosshair is fixed to the middle of the screen. Move the map around to the position you require. You may need to pinch-zoom the map to get a clearer view of the map.
- Once you have the position, tap onto the lock/unlock GPS switch (top right). When GPS is locked, the GPS info bar turns green. Your position is now fixed.
- Either tap the camera button or swipe back across to get back to the camera. The GPS info bar is now green in the camera view.
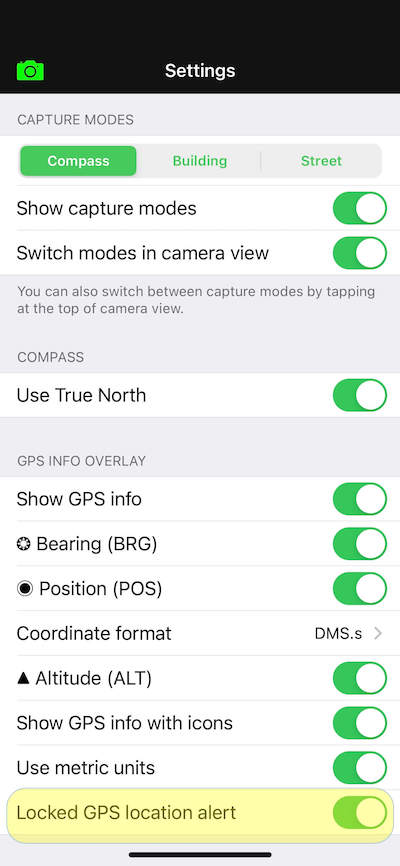
- When you take a photo with GPS in a locked position, you will get an alert to remind you if you have moved to another location, so you don’t take photos with incorrect coordinates. Tap continue to take the photo. (This alert can be switched off in Solocator settings if you need to take many photos in one location.
- Photos taken with a locked position are highlighted with a green dot in the Solocator photo library as a helpful reminder.

